
Bienvenido a la sección de ayuda
Community Budget
Click on Control Panel > Community Budget. Click on New Budget on the top right hand corner of the screen to enter a new budget
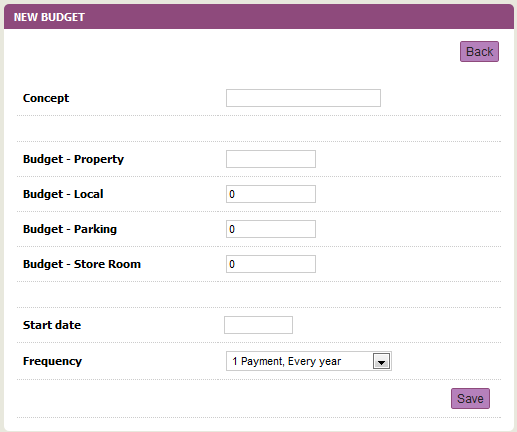
First of all you have to define a Concept. This is really a text box where you can type in any text to describe the budget. The most general concepts are that the budget is for a particular fiscal year, so you may type in “Community Fees 2011” or if it is some extra ordinary costs, such as “Repairing the lift 2011”. Your budget may run from one calendar to another, in which case you may want to specify “Communities fee Mar 2010 to Feb 2011”. The text box is only information for you and the owners to associate the fees to.
If your community only consists of residential properties and there are no extra charges associated to locals (shops or commercial property), parking or storerooms then all you have to do is enter the full budget sum in the field of Budget – Property, leaving the other fields for parking, local and Store Room empty. If you have separate budgets for either one of these items, then just enter the relevant part for each type.
START DATE can be changed to any date. Some community budget start from the date where the construction of the community was completed. For example a community that was completed on 2 August 2001 and the accounting handed over to the administration company on that date. In this case all you need to do is set the start date of the budget to 2 August (current calendar year*). The system will automatically distribute the fees starting from this date based on the next field that you chose. (Note that each year you will have to add the budget for that fiscal year).
FREQUEUNCY is what defines how many payments the budget is split into.The available frequencies are: yearly, every six months, every semester, quarterly, bimonthly or monthly. For example if the start date is 6 July 2011, the program will calculate the frequency accordingly from 6 July 2011 to 5 July 2012.
Once you have added a budget, the system will automatically create a budget entry with details (Fig 1.4). The budget will show you the start date from which the first payment is due and calculated, the type by which it is distributed and the total budget per frequency. For example in Figure 1.4 The total budget is 100,077.09 and frequency is selected as “4 paments. i.e every three months). Therefore the total budget divided by 4 provides us with the budget for each period (frequency).
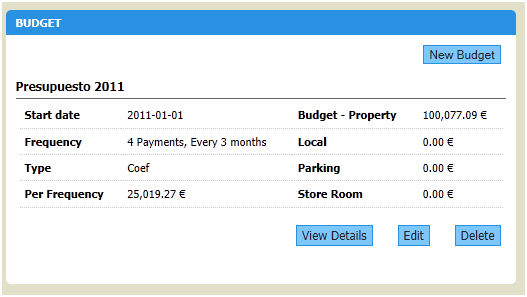
You can easily Edit or Delete any budget. The icons are located on the bottom right hand side of the screen.
Once you have added a budget, you can click on “View Details” to see how the budget is distributed click (Figure 1.5). Under the section Payments, you will see that the budget is split according to the frequency you had selected. The concept for all payments will obviously remain the same. For each payment you will see that you have the option to get further “Detailed View”. This option will provide you with the full details of what each owner will see as their fees due to be paid for that period.
REMINDER: the COMMUNITY BUDGET module only allows you to displays the fees for each property / owner. It is not a representation of a property owner has paid or regarded as any transaction history.
Add Discount. There is an option to also show discounts. A community may apply several types of discounts. Click on Add Discount and you will get the follow window (Figure 1.6) Simply by entering the number of days in which a payment can be made to obtain the discount, the relevant amount will be calculated according to the fees due.
You can also add fixed amounts that will not be calculated based on a %. For example one community may provide a discount for those who have opted to receive their communication in electronic format. So the date in this case will be the same date as each payment is due (you may have to enter one for each month or quarter), then you clarify what the discount is for, with a brief description in the Subject line and then select the Amount option and enter the amount for example €10.00. You can add more discounts by using the or delete a discount using the . Once finished click Save to apply the discounts.
[Languages Available]